Original URL: https://trevorsmale.github.io/techblog/post/pacu2/
Essential Tools 🛠️
Intro
We have reached the second week of the PAC and things are getting more serious. Now that we are familiar with the flow of the course and expectations are set, the second lesson has started with some momentum. 💺
Unit 2 lab exercise notes 🧪
I am completing the labs locally carefully covering every command listed by running them and checking output, making sure to pay attention to details like options. It was fairly time consuming, yet I learned quite a bit.
🧭 Basic CLI exercise:
- cd ~ # Change Directory to Home
- ls ~ # List
- mkdir evaluation # Make Directory called ’evaluation'
- mkdir evaluation/test/round6 # This fails why? We need to use the Parent option ‘-p’
- mkdir -p evaluation/test/round6 # Make parent directory with subdirectories
- cd evaluation # change directory to evaluation
- pwd # present/print working directory = /home/ts/evaluation
- touch testfile1 # create file name ’testfile1’ in current directory
- ls # list = test testfile1
- touch testfile{2..10} # Creates a numbered range of testfile touch .hfile .hfile2 .hfile3 # this creates three dot files which are not visible to a normal listing method, we must use list all (ls -a)
🔍 Gathering System Information
I am running Rocky Linux 9 on a local Proxmox container for this course.
- hostname = localhost.localdomain
- uname # system info command which stands for Unix Name
- uname -a # shows a comprehensive list of system info Kernal name# Hostname, Kernel release, Kernel version, Machine hardware name, Processor type, Hardware platform, Operating system.
- uname -r # the -r option stands for release and shows the kernel release version.
🧠 Checking the amount of RAM/Memory
- sudo cat/proc/meminfo # concatenate process memory information
- free # displays total, used, free, shared, buffer, and available memory (RAM and SWAP)
- free -m # megabyte display option for the free command
👨🏻💻 Checking the number of processors and processor info
- cat/proc/cpuinfo # concatenate process central processor unit information = 4 processors on my lab.
- cat /proc/cpuinfo | grep proc | wc -l # what we are doing here is piping the output of the previous command to grep which is filtering lines starting with proc, then we pipe through to word count with line option to cleverly count the number of processors, the result is 4
💾 Checking storage usage and mounted filesystems
- df # the disk free command
- df -h # we are adding the human readable option to df in order to more easily ascertain what is going on.
- df -h | grep -i var #
💾 Mounting a new file system
Common mount Command Options
-
-t # Specify the filesystem type (e.g.,
ext4,xfs,vfat). -
-o # Specify options in a comma-separated list (e.g.,
rw,ro,noexec). -
-a # Mount all filesystems defined in
/etc/fstab. -
-r # Mount the filesystem as read-only.
-
-w # Mount the filesystem as read-write.
-
-v # Verbose mode, provides more detailed output.
-
–bind # Bind mount, remount part of the filesystem elsewhere.
-
–make-shared # Make a mounted file system shared (for propagating mount events).
-
-L # Mount by filesystem label.
-
-U # Mount by UUID.
-
mount | grep –i home# lists all mounts starting with the case sensitive phrase home (I was not getting any result 🤔)
-
mount | grep -i sd# this lists all SCSK disks, normally named sda, sdb, sdc etc…
Trying out alternative commands
- findmt# find mount
- cat /proc/mounts# concatenate in-process mounts
- lsblk# list block devices
I was unaware that commands could be chained together with a semicolon
cd ~; pwd; df -h# change directory to home, then print working directory, then list disk usage in a human-readable format 🧐.du -sh# disk usage summary in a human-readable format.
du Command Options
 **`-a`**# Display disk usage for all files, not just directories.
**`-h`**# Show disk usage in human-readable format (e.g., KB, MB, GB).
**`-s`**# Show summary of total disk usage for a directory.
**`-c`**# Produce a grand total at the end.
**`-L`**# Follow symbolic links (default `du` doesn't follow symlinks).
**`-d N`** or **`--max-depth=N`**# Limit directory depth to N levels.
**`--time`**# Show modification time of directories.
**`-b`**# Show disk usage in bytes.
**`-k`**# Show disk usage in kilobytes.
**`-m`**# Show disk usage in megabytes.
**`--apparent-size`**# Show the apparent size instead of disk usage.
**`-x`**# Skip directories on different file systems.
**`--exclude=PATTERN`**# Exclude files matching a pattern.
Uptime
`uptime`# Shows time in HH:MM:SS Unix time format in local time. If the time is not set, like in my instance, I get UTC 0🧐. Next, it shows how long the system has been running, the number of logged-in users, and finally, the load average over the last 1, 5, and 15 minutes.
Last
 **`last`**# Lists all users who have logged in from latest to oldest.
**`w`**# Lists current users and associated processes.
**`who`**# Shows who is currently logged on. The output `pts/0` stands for pseudo terminal, typically shown when logged in remotely. It will show either an IPv4 or IPv6 address and the login time. When I logged into my Ubuntu server via SSH, I was shown the IPv6 address. 🤯
**`whoami`**# Tells which user you are.
Checking environment
 **`printenv`**# Shows a long list of environmental information.
**`printenv | grep -i home`**# Shows that I am in the home directory of `root`.
**`id`**# Shows a lot of info about UID, GID, and group memberships, including SELinux policies.
**`echo $SHELL`**# Displays the path of the shell environment variable, in my case, `/bin/bash`.
Check running processes and services
 **`ps -aux | more`**
**`ps -ef | more`**
**`ps -ef | wc -l`**
Check memory usage
Run each of these commands individually for understanding:
 **`free -m`**
**`free -m | egrep "Mem|Swap"`**
**`free -m | egrep "Mem|Swap" | awk '{print $1, $2, $3}'`**: What are the first, second, and third columns? How would I know the variable names?
**`free -t | egrep "Mem|Swap" | awk '{print $1 " Used Space = " ($3 / $2) * 100"%"}'`**: Similar question for these variables.
Testing out scripts
Q: Have you ever written a basic check script or touched on conditional statements or loops?
A: Yes very basic 😅
(Use ctrl + c to break out of these) 👍
 while true; do free -m; sleep 3; done
Watch this output for a few and then break with ctrl + c
Try to edit this to wait for 5 seconds
Try to add a check for uptime and date each loop with a blank line between each and 10 second wait:
while true; do date; uptime; free -m; echo “ “; sleep 10; done
Since we can wrap anything inside of our while statements, let’s try adding something from earlier:
While true; do free -t | egrep "Mem|Swap" | awk '{print $1 " Used Space = " ($3 / $2) * 100"%"}'; sleep 3; done 👍
seq 1 10
Q: What did this do?
A: it counts from 1 to 10, creating a new line for each char.
Q: Can you man seq to modify that to count from 2 to 20 by 2’s?
A: yes by using ‘First Increment Last, so 2 2 20’
Let’s make a counting for loop from that sequence ✅
for i in seq 1 20; do echo “I am counting i and am on $i times through the loop”; done 👍
Q: Can you tell me what is the difference or significance of the $ in the command above? What does that denote to the system?
A: we are using the $ to access a variable.
Uptime – The time a system has been running for without interruption. Standard input - stdin ‘0’ the default stream where a program receives data. Standard output - stdout ‘1’ refers to default stream output of a program. Standard error – stderr ‘2’ refers to a default stream wherein an error is sent.
Reflecting on Unit 1 🤔
Week 1 went well for me. I was very excited to start this course as it strongly aligns with my professional interests, and it came at a great time. I am incredibly grateful to have access to such a talented group of like-minded and enthusiastic professionals.
I managed to complete everything for Week 1 by preparing in advance. For example, I created this blog and started some of the materials early. The night before the course began, I went through Vim Tutor and Vim Adventures to give myself a bit of a head start, as my time is currently divided between various responsibilities. I also dedicated a significant portion of my time to starting my capstone project and troubleshooting issues.
I’ve set aside 8 hours per week, as suggested by Scott, for attending lectures, reading materials, practicing labs, and doing general research. During Week 1, I used roughly 6 hours, so I believe I’ve allocated enough time to complete the course work.
My note-taking has been excellent for this course. Prior to starting, I learned how essential note-taking is to the administration and engineering process, so I began using LogSeq as my note-taking tool four months ago. This gave me time to familiarize myself with its features, allowing me to dive into the lectures fully prepared. I’m also a fast touch typist, so I can easily listen and type simultaneously. After each lecture, I review and organize my notes by nesting and tagging information to relate it to other topics. Additionally, I’ve been reflecting on everything by writing in this blog.
Security Enhanced Linux
Brief intro to SELinux
SELinux (Security-Enhanced Linux) is a security module integrated into the Linux kernel that enforces mandatory access control policies to provide more granular control over how processes and users interact with files and resources. By defining strict rules on what actions each program or user can perform, SELinux significantly enhances the security posture of a Linux system, helping to prevent unauthorized access and exploits.
Brief intro to Apparmor
AppArmor (Application Armor) is a Linux security module that enforces access control policies based on file paths, limiting what resources applications can access to enhance system security. It provides a simpler, profile-based alternative to SELinux, allowing administrators to create restrictive environments for individual applications without requiring deep changes to system configuration.
Key Terminology
Mandatory Access Control – Discretionary Access Control – Security contexts (SELINUX) – SELINUX operating modes -
Comparing AppArmor and SELinux for Container Separation 1
This article provides a brief comparison between SELinux and AppArmor regarding their effectiveness in securely separating containers.
After reading, it became clear that AppArmor is not an ideal choice for DevSecOps when it comes to securely separating containers. This is due to AppArmor’s lack of support for Multi-Category Security (MCS). MCS allows for a hierarchy of controls, granting varying levels of access.
Therefore, if you’re looking to securely separate containers without relying on Virtual Machines—which can be costly—SELinux emerges as the better option for such tasks.
Key Takeaways 📝
- AppArmor is not label-based, unlike SELinux.
- AppArmor is generally seen as more user-friendly.
- AppArmor has fewer controls compared to SELinux.
- AppArmor has fewer operations available.
- Both support the Type Enforcement security model (a form of mandatory access control).
- The security model is based on rules where subjects (like processes or users) are allowed to access objects (e.g., files, directories, sockets, etc.).
- AppArmor lacks Multi-Level Security (MLS).
- AppArmor does not support Multi-Category Security (MCS).
- 🔄 Because MCS is unavailable, AppArmor cannot maintain proper separation between containers.
- ⚠️ The default container policy in AppArmor is very loose, which could present security risks.
Quick Comparison Table 🔍
| Technology | Type Enforcement | MLS/MCS | Policy Generator | Generator for Containers |
|---|---|---|---|---|
| AppArmor | Yes | No | Yes | No |
| SELinux | Yes | Yes | No* | Yes |
By understanding these differences, it’s clear that SELinux provides a more secure framework for container separation, making it a crucial tool for modern DevSecOps workflows.
Enabling SELinux
Before enabling SELinux, you can verify its current status by running the sestatus command, which provides the Security Enhanced Status of the system. To activate or configure SELinux, you need to modify the configuration file located at /etc/selinux/config. SELinux can operate in two modes:
- Enforcing: SELinux policies are actively enforced, and violations are blocked.
- Permissive: Policies are not enforced, but violations are logged for review, allowing for troubleshooting without blocking actions.
SELinux Contexts
A context in SELinux is a set of security labels used to manage access to files, processes, and other system resources. The context is composed of several fields:
system_u:object_r:httpd_sys_content_t:s0user:role:type:levelBreakdown of Context Components:
User: Represents the SELinux identity of a subject (process) or object (file). Role: Groups privileges for processes and users, determining what they are allowed to do. Type: Defines how subjects (processes) can interact with objects (files or resources). Level: Used in Multi-Level Security (MLS) or Multi-Category Security (MCS) systems for additional granularity in access control.
Taking SELinux for a spin on a Rocky 9 VM in my Proxmox Homelab
A few weeks ago, I learned how to create uninitialized templates with Proxmox, meaning the SSH keys are generated for each copy of the template. This is done with cloud init.
So today I created a clone of my template specifically for getting hands on experience with SElinux
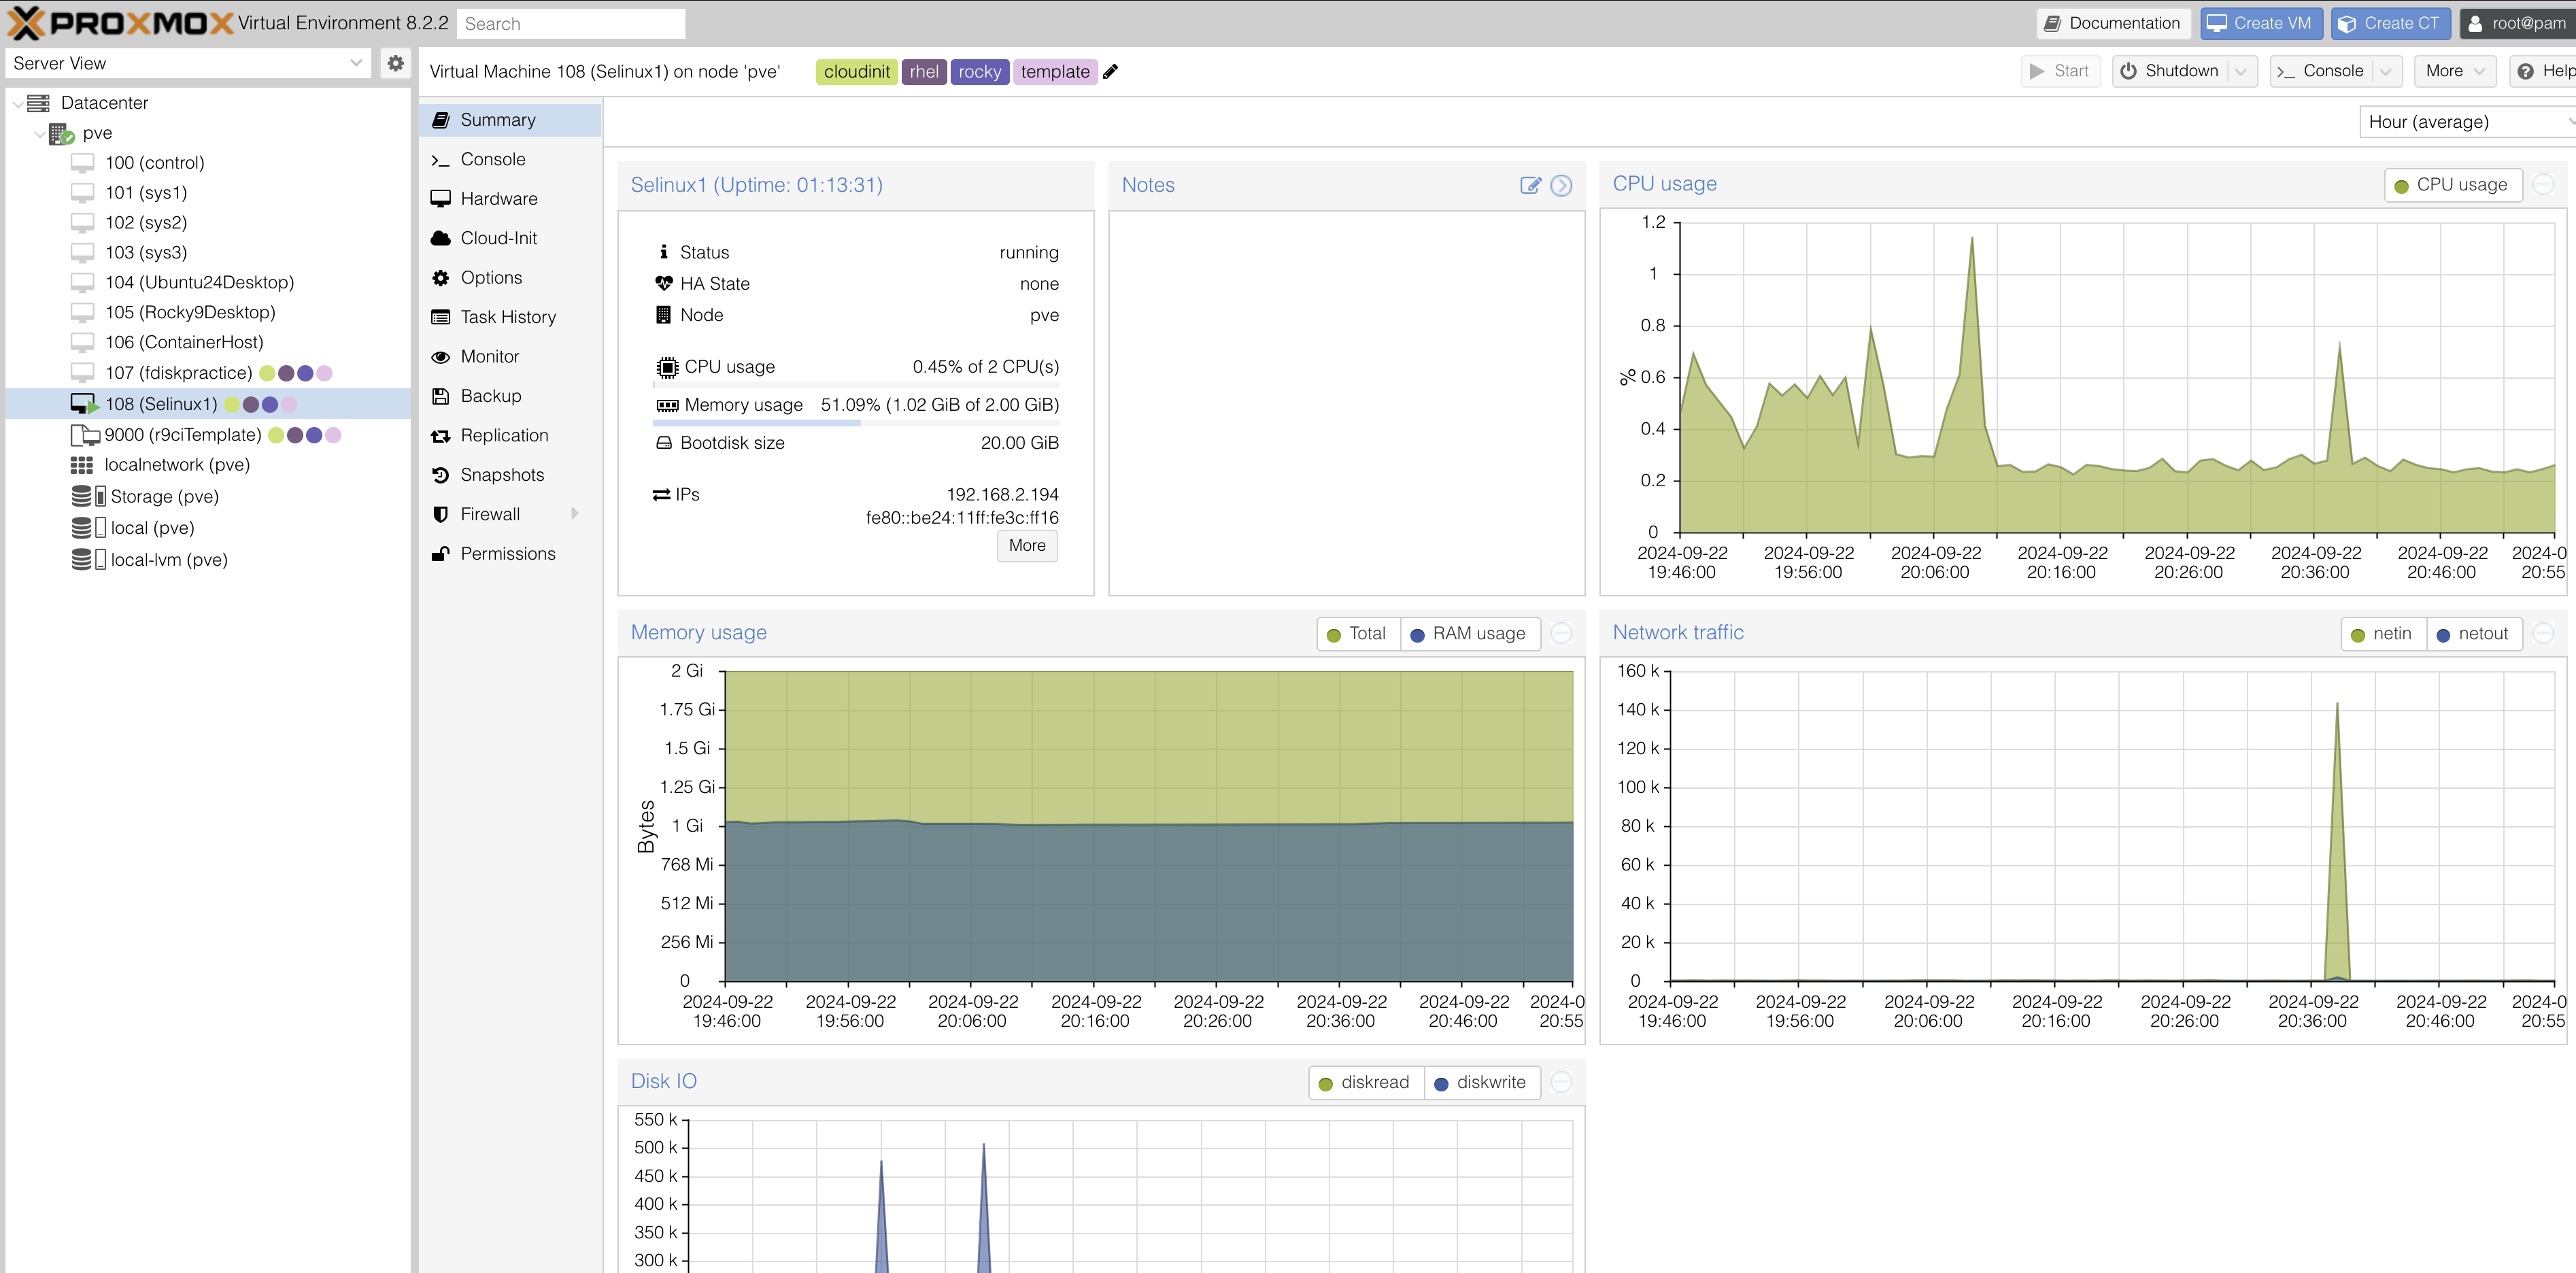
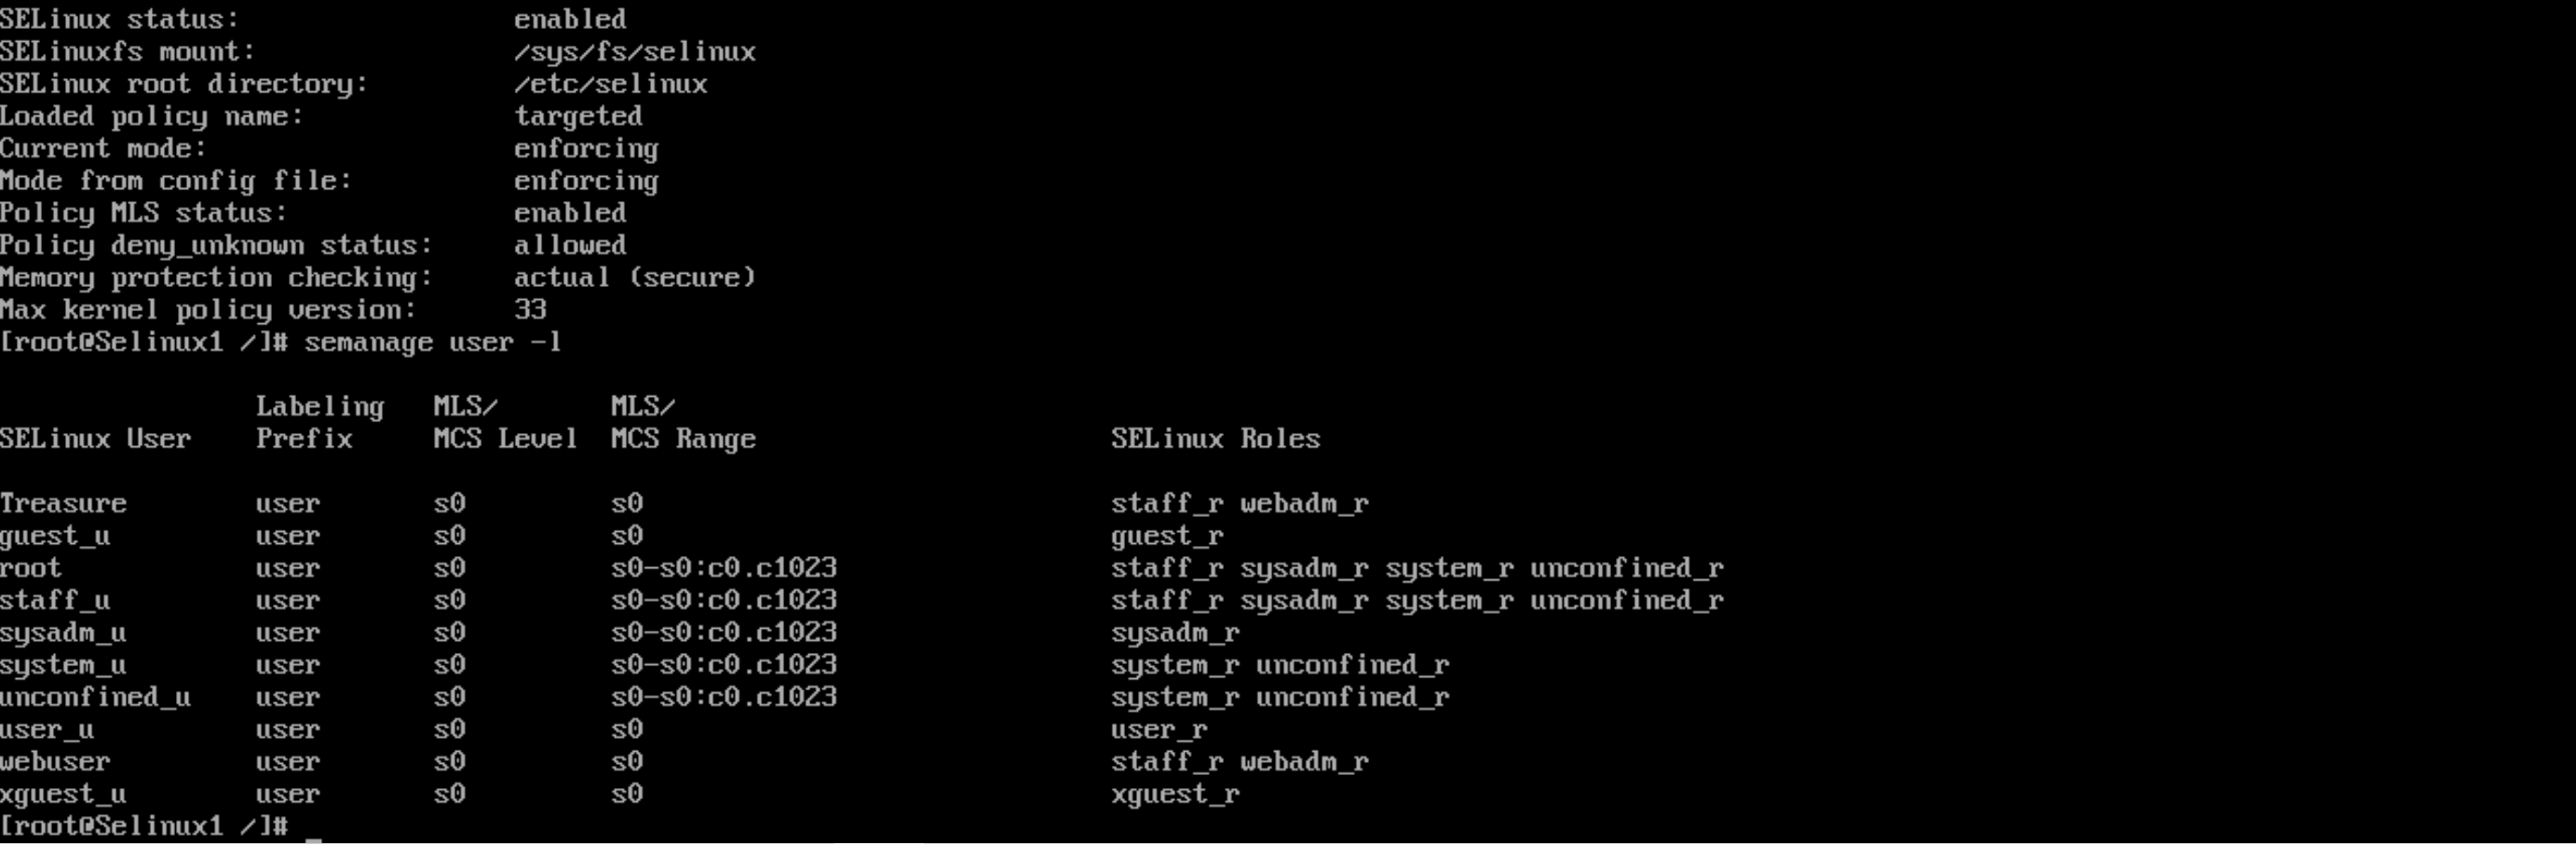
I opened the /etc/selinux/config and set se to enforce. I then ran sestatus to confirm selinux had been activated. I created a new user policy for myself with semanage user -a -R ‘staff_r webadm_r’ Treasure here is the result after running semanage user -l
SELinux scenario contemplation
- You follow your company instructions to add a new user to a set of 10 Linux servers.
- They cannot access just one (1) of the servers.
- When you review the differences in the servers you see that the server they cannot access is running SELINUX.
- On checking other users have no problem getting into the system.
- You find nothing in the documentation (typical) about this different system or how these users are accessing it.
- What do you do? Where do you check?
From the given information, it seems likely that SELinux is denying access to the new user. To troubleshoot this, I would take the following steps:
-
Check SELinux User Configuration:
I would run the commandsemanage user -lto list all SELinux users and confirm whether the new user exists within the SELinux policy. -
Verify MLS/MCS Levels and Roles:
If the user is already registered, I would review the user’s Multi-Level Security (MLS) or Multi-Category Security (MCS) level and verify the role assigned to the user. It’s important that the user’s role matches those that have the necessary access permissions. -
Assign Appropriate Role:
If the current role restricts access, I would assign the user to an SELinux role that permits access to the system, ensuring that role-based access control (RBAC) is properly configured.
Interactive Killercoda Lab 2
I hope this was designed to be challenging, because I was challenged 😅
Despite paying close attention, I somehow got confused by this challenge. I suppose the exercise was designed to force me to read through documentation, which was tough. But I am proud to say that through trial and error, I was able to get through.
Commands I looked up in the documentation:
- kubectl get deployment spacecow -n moon -o yaml > spacecow-deployment.yaml
- vim spacecow-deployment.yaml
- kubectl apply -f spacecow-deployment.yaml
Troubleshooting
How Troubleshooting Differs Between Administrator and Engineer
- Administrators focus on restoring functionality to existing systems, while Engineers work on building and implementing new systems or improvements.
- Administrators have existing documentation to reference for troubleshooting, whereas Engineers are responsible for creating new documentation.
- Administrators can compare similar systems for inconsistencies, but Engineers may be working with entirely new systems or solutions, making such comparisons difficult.
Administrators:
- Fix: Restore systems to their previous, working state.
- Optimize: Use tools like Ansible or custom scripts to streamline operations and automate repetitive tasks.
- Operate: Handle daily tasks that cannot be automated, such as monitoring or handling unexpected issues.
Engineers:
- Prepare: Configure pre-built tools for daily use and ensure they integrate smoothly with existing systems.
- Plan: Anticipate and strategize operational changes, such as the introduction of new tools or system upgrades.
- Design: Create new tools, systems, or measures that address organizational needs and future challenges.
- Implement: Deploy new or upgraded systems and produce comprehensive documentation to support ongoing maintenance and troubleshooting.
Key Differences in Troubleshooting:
- Administrators typically deal with reactive troubleshooting, where the goal is to quickly restore functionality after an issue occurs. Engineers, on the other hand, often engage in proactive troubleshooting by identifying potential problems before they happen, ensuring that systems are scalable and sustainable.
- While administrators may focus on resolving immediate operational issues, engineers are responsible for the long-term stability of systems, often troubleshooting while keeping future requirements in mind.
Troubleshooting Procedure
1. Identify the Problem
- Gather Information: Ask questions, check logs, or run diagnostics to gather all necessary details.
- Reproduce the Issue: Try to replicate the problem to confirm its existence and scope.
2. Establish a Theory of Cause
- Look for Patterns: Are there recurring errors or conditions?
- Use Known Issues: Refer to documentation, previous cases, or online resources to match symptoms to potential causes.
- Hypothesize: Develop potential explanations based on the data you’ve collected.
3. Test the Theory
- Isolate Variables: Disable or eliminate components one by one to test your theory.
- Try Quick Fixes: Implement minor changes to see if the problem is resolved, such as restarting services or clearing caches.
4. Create an Action Plan
- Plan for Resolution: Identify the steps needed to fix the problem if your theory is confirmed.
- Consider Impact: Make sure to assess any risks or side effects of your solution.
5. Implement the Solution
- Execute the Fix: Apply the necessary changes, whether it’s a configuration adjustment, software update, or hardware replacement.
- Monitor: Observe the system closely to ensure the issue doesn’t recur.
6. Verify Full System Functionality
- Test the Fix: Confirm the problem is fully resolved and that other services or systems haven’t been affected.
- Ask Stakeholders: Ensure end-users or relevant parties can validate the fix.
7. Document the Findings
- Write It Down: Document the issue, the root cause, the solution, and any potential future prevention methods.
- Share Knowledge: Ensure others on your team or organization can reference the solution.
8. Prevent Future Issues
- Review System: Investigate whether the root cause indicates a larger problem.
- Proactive Monitoring: Set up alerts, automations, or optimizations to prevent recurrence.
Notes
DHCP
- DHCP Should only be assigned by one server
- What is a BootP?
- DHCP is a process that comes from BootP?
- Layer 2 based on Mac address
First day on the job, you must inventory the servers
- Nmap
- History on CommandLine (Find the IP’s)
- Ping Sweep for OpenSSH
- Create a local Inventory File
Questions I have from this week:
- How often does a Jr. Admin implement SELinux?
- If apparmor is so much less functional than SELinux, why is it still a popular choice? is it due to ease of use?
- you mentioned Irata? I was unable to look it up.
- free –m| egrep “Mem|Swap” | awk ‘{print $1, $2, $3}’: what is 1, 2 and 3. Is there an easy way to know which variables pertain to which data?
How are you going to use what you’ve learned in your current role?
I have no direct application for most of this stuff at the moment. however I will definitely use scripting in my current position in order to automate tasks. Furthermore, I will def remember several commands from the labs that I will likely use daily.
ProLUG Links ⛓️
Discord: https://discord.com/invite/m6VPPD9usw Youtube: https://www.youtube.com/@het_tanis8213 Twitch: https://www.twitch.tv/het_tanis ProLUG Book: https://leanpub.com/theprolugbigbookoflabs KillerCoda: https://killercoda.com/het-tanis